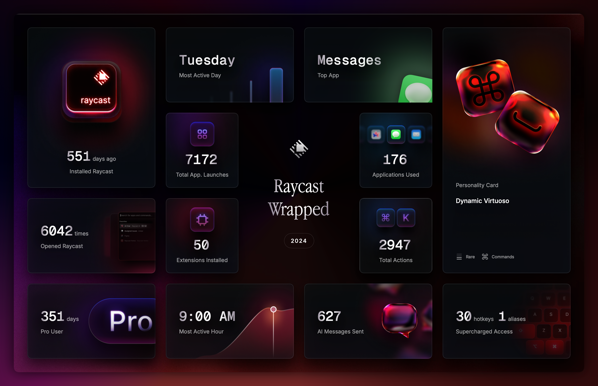
It’s Mac maintenance day. I’m focused on backups today. I use Synology Active Backup to backup the Macs in our household. It’s a really powerful solution that works well. Not only do I backup our Macs to the Synology, I then backup the Synology to C2 offsite storage.

As I continue to leverage my Dream Machine Pro by utilizing the features it provides, the next thing I’m working on is setting up DDNS and Teleport. I’ve already got DDNS configured to work with Cloudflare but that requires running a script on my Raspberry Pi. I recently removed my Raspberry Pi’s from the server rack so it’s time to mix it up.

UniFi doesn’t support Cloudflare for DDNS, for some reason. They support a number of other platforms though, and Namecheap is one of them. I host some of my domains on Namecheap as well as Hover so I decided to simplify things and go with a supported solution. So, tonight I transferred my homelab domain from Hover to Namecheap and once the transfer is complete, I’ll setup DDNS and do away with my Cloudflare config.

I believe this means I’ll also need to stop using Cloudflare tunnels since Namecheap will act as the name server. That’s alright. I don’t really care if I use Cloudflare tunnels or not, honestly.

I also removed my Wireguard config for VPN access. I’m going to only use Teleport, UniFi’s solution which is built on top of Wireguard anyway. And my current Wireguard solution broke when I removed the Raspberry Pi’s. so I needed a new solution and Teleport is it.

I look forward to this more streamlined solution using built-in functionality.

The never ending quest to simplify continues.

Most recently, I’ve removed two Raspberry Pi’s from my server rack. Instead of relying on these machines to handle ad blocking, DNS, and a few other seldom used duties, I am now defaulting to the Dream Machine Pro for DNS and I’ve installed Wipr on my iPhone, iPads, and Mac.

I’m down to one Mac now. Feels good to stop thinking about syncing data across machines.

For Setapp, I’m on a plan that allows me to install apps on four Macs. I’m done with that. I’ve switched to a one Mac plan and am saving a bit of money. I don’t tend to use iOS Setapp apps so I’ve removed that as an option. I was going to see if I could unsubscribe from Setapp but I get too much value out of it.

In my Home app, I deleted 90% of the automations. Most were disabled anyway. I really only use a few so finally decided to go ahead and delete anything that’s been disabled for a while now.

What’s next? I’m scouring my digital life, looking for subscriptions to cancel and ways to simplify.

Dog in yellow

My Kubernetes learnings for last week

As my journey into Kubernetes continues, I focused on finalizing my infrastructure and laying down the foundation of a cluster. As mentioned in prior posts, I’m building a cluster on three AWS EC2 instances.

Containerd

We finished up installing containerd. As part of the process, we had to update SystemdCgroup from false to true in the /etc/containerd/config.toml file and instead of using Vim we used this command, which was very efficient.

`sudo sed -i ’s/SystemdCgroup = false/SystemdCgroup = true/g' /etc/containerd/config.toml

The last part of the process involved creating a script to run on the worker nodes so that we didn’t have to retype all of the commands again.

#!/bin/bash

# Install and configure prerequisites
## load the necessary modules for Containerd
cat <<EOF | sudo tee /etc/modules-load.d/k8s.conf
overlay
br_netfilter
EOF

sudo modprobe overlay
sudo modprobe br_netfilter

# sysctl params required by setup, params persist across reboots
cat <<EOF | sudo tee /etc/sysctl.d/k8s.conf
net.bridge.bridge-nf-call-iptables  = 1
net.bridge.bridge-nf-call-ip6tables = 1
net.ipv4.ip_forward                 = 1
EOF

# Apply sysctl params without reboot
sudo sysctl --system

# Install containerd
sudo apt-get update
sudo apt-get -y install containerd

# Configure containerd with defaults and restart with this config
sudo mkdir -p /etc/containerd
containerd config default | sudo tee /etc/containerd/config.toml
sudo sed -i 's/SystemdCgroup \= false/SystemdCgroup \= true/g' /etc/containerd/config.toml
sudo systemctl restart containerd

After creating the above on each node and making it executable, I ran it.

Install kubeadm, kubelet, and kubectl

We installed an earlier version so that later in the course, we can experience an upgrade to the latest.

After issuing the commands to install kubeadm, kubelet, and kubectl on the control plane, as we did earlier, we created a script on the worker nodes, made it executable, and then ran it. Here’s the script.

# Install packages needed to use the Kubernetes apt repository
sudo apt-get update
sudo apt-get install -y apt-transport-https ca-certificates curl gpg

# Download the Google Cloud public signing key
# If the directory `/etc/apt/keyrings` does not exist, it should be created before the curl command.
# sudo mkdir -p -m 755 /etc/apt/keyrings
curl -fsSL https://pkgs.k8s.io/core:/stable:/v1.28/deb/Release.key | sudo gpg --dearmor -o /etc/apt/keyrings/kubernetes-apt-keyring.gpg

# Add the Kubernetes apt repository
echo 'deb [signed-by=/etc/apt/keyrings/kubernetes-apt-keyring.gpg] https://pkgs.k8s.io/core:/stable:/v1.28/deb/ /' | sudo tee /etc/apt/sources.list.d/kubernetes.list

# Install kubelet, kubeadm & kubectl, and pin their versions
sudo apt-get update
# check available kubeadm versions (when manually executing)
apt-cache madison kubeadm
# Install version 1.28.0 for all components
sudo apt-get install -y kubelet=1.28.0-1.1 kubeadm=1.28.0-1.1 kubectl=1.28.0-1.1
sudo apt-mark hold kubelet kubeadm kubectl
## apt-mark hold prevents package from being automatically upgraded or removed

Once this is done, all of our nodes are setup with the foundational components.

Initialize cluster with kubeadm

Now that all of our nodes are configured with the foundational components, it’s time to initialize the cluster with kubeadm.

sudo kubeadm init

Here’s where initialize the cluster. After entering that command, several things happen:

Pref-flight checks

  • Images pulled
  • Certificates generated in /etc/kubernetes/pki/
  • kubeconfig generation admin.conf, kubelet.conf, controller-manager.conf, scheduler.conf kubeconfig files
  • kubelet-start environment in /var/lib/kubelet/
  • control-plane - create static pod manifests for API server, controller-manager and scheduler in /etc/kubernetes/manifests which kubelet is watching for pod to create on startup
  • addons applied - CoreDNS and kube-proxy

Now if we type service kubelet status again, it is now in a running state.

With that, our foundation has been laid. I learned a lot this week. I’m eager to connect to the cluster and carry on this upcoming week.

Kubernetes Odysseys for July 12, 2024

Kubernetes Odysseys are curated highlights from my explorations across the web. I seek out and share intriguing and noteworthy links related to all things Kubernetes. You can find all my Kubernetes bookmarks on Pinboard and explore all my blog posts categorized under Kubernetes.

EKS Workshop

Practical exercises to learn about Amazon Elastic Kubernetes Service. I browsed most of the workshop instructions and am impressed with the structure, depth, and approach Amazon has taken here. While I’m currently building a cluster from scratch using AWS EC2, at some point I plan to follow this workshop and potentially stream my experience on Twitch. If that interests you, let me know.

Docker Containers vs. Kubernetes Pods - Taking a Deeper Look

A fascinating deep dive by the venerable Ivan Velichko of iximiuz Labs, [The] Learning Platform to Master Cloud Native Craft. In this article, Ivan explores the differences between Docker Containers and Kubernetes Pods in a masterful way. The most intriguing part for me? As I read the article, I was able to follow along in a lab. See the screenshot below to see what I’m talking about. Brilliant. Absolutely brilliant way to read an article and learn by doing.

Image

Finally, for this week’s Kubernetes Odyssey, I will leave you with a fantastic visual tool you may want to check out for your clusters.

VpK - Visually presented Kubernetes

This application, available on GitHub, presents Kubernetes resources and configurations in a visual and graphic fashion. You can install it on a local computer or from a Docker container. Keep in mind, this is not a real time monitoring tool. It’s a way to capture a snapshot in time. Check out some of these visuals you can create with it…

Image

Image

That’s it for this week’s Kubernetes Odyssey. Thanks for reading and I’ll see you next week with more links from my travels across the web. - Donovan

Zapier now makes it possible to add checklists to Interface pages. I made a video about it.

youtube.com/watch

In this video, I share how to customize the start page in Safari.

Last week I learned

Over the course of the last week, I learned…

  • Docker
  • Kubernetes

Docker

I finished the [[Docker Training Course for the Absolute Beginner]] this week.

The main takeaways from the final sections of the course revolved around the Docker Engine, Storage, Networking, and the Registry.

This was extremely valuable as it cleared up for me so many things I’ve only passively dealt with up to this point as I’ve deployed containers in my homelab. Now, I have a much better understanding.

I know where Docker’s default location for storing volumes is located and the difference between volume and bind mounts. I have a much better understanding of networking. Eg, I know that the default network created by Docker is a bridge network and typically has the 172.17.x.x subnet. Especially exciting is that I understand how to create my own user-defined network by simply entering the following on the command line

docker network create \
  --driver bridge \
  --subnet 182.18.0.0/16
  custom-isolated-network

I don’t know why, but I find it magical that I can type that into my computer and create a network as simple as that.

Finally, I am glad to have a much better understanding of how the Docker Registry works as well as how to deploy a private registry. To deploy a private registry, one can run a Docker registry image. Of course you can.

docker run -d -p 5000:5000 --name registry registry:2

Once you’ve got a local private registry, you can push and pull your images there instead of to the default Docker Registry. Incredibly handy and valuable to know how this all works.

That concludes my foray into learning about Docker for now. I will continue to brush up on my knowledge but now that I’m done with this beginner course, my attention shifts back to Kubernetes.

Kubernetes

The central piece of my learning revolves around Kubernetes. Though I am sprinkling in the basics and Docker as outlines above, my primary focus is on Kubernetes and attaining my administration certification. As I mentioned before, I yearn to learn Kubernetes and the surrounding components that will make me a great administrator so I can’t simply study Kubernetes all the time.

With that in mind, here’s what I learned about Kubernetes this week.

I started yet another course on Kubernetes this week. It’s the CKA Course by TechWorld with Nana. They recently revamped the content and I was on the waiting list to be notified when it was ready. As soon as I got the email, I signed up and hit the ground running. I’m so glad I did. Based on my current knowledge and the format of this new course, I’m learning a lot of new things as well as reinforcing other things I’ve learned along the way.

One major difference between the KodeKloud CKA course and the TechWorld CKA course is that with the TechWorld course, we start off by creating, from scratch, our own cluster on three AWS EC2 instances. This exercise alone, and the explanations of the core structure and components has been tremendously helpful for my comprehension. To be fair, we did cover these elements of creating a cluster from scratch in the KodeKloud course but it was theoretical-heavy, a bit abstract, didn’t happen until nearly the end of the course, and ultimately rife with complexity. With TechWorld, it’s literally the first thing we do and for me, it’s a much more powerful way to learn.

I’ll summarize some of the highlights of my TechWorld CKA course below.

After a high level overview of Kubernetes which was helpful to review, we dove into understanding TLS certificates, how they factor into a cluster, and what we’ll be doing with them to allow the cluster components to securely talk to each other.

Then we moved on to provisioning our infrastructure. We set up three AWS EC2 instances and configured them with an Ubuntu foundation.

Through this process, i gained some hands on experience with AWS, EC2 in particular, and got a really solid understanding of how to configure the control plane and worker nodes. Creating my own cluster on the cloud from scratch has given me a very solid understanding of what is happening and why.

For instance, my understanding of static pods is now much deeper. We can’t leverage the API Server and Scheduler to schedule pods on the control plane if those don’t exist, right? That’s why we need to generate static pod manifests, place them in the /etc/kubernetes/manifests directory, and let Kubelet do it’s thing as we bootstrap the cluster.

Again, I know we covered these topics in the KodeKloud course, and I’m definitely not knocking the course, but there is something about the approach that TechWorld is taking that simply resonates more with me. I understand this so much better after having gone through it this time around.

I then learned how to install kubeadm. We disable memory swapping, open ports via configuring security groups, and setting up hostnames for the nodes. The Kubernetes docs are thorough in this respect and it was helpful to have a course instructor pointing out the sections to really pay attention to.

Finally, we went in depth on Container Runtimes and the Container Runtime Interface. My understanding of this topic has increased tremendously as I can now capture in writing, as I have done in my Zettelkasten, why we might go with containerd and whey Kubernetes moved away from only supporting Docker containers as it did in the beginning.

That’s a wrap for this week’s learnings. If you made it this far, thanks for reading! See you next week with another wrap up.

Kubernetes Odysseys for July 5, 2024

Kubernetes Odysseys are curated highlights from my explorations across the web. I seek out and share intriguing and noteworthy links related to all things Kubernetes. You can find all my Kubernetes bookmarks on Pinboard and explore all my blog posts categorized under Kubernetes.

Flux

Flux is a set of continuous and progressive delivery solutions for Kubernetes that are open and extensible.

A visual guide on troubleshooting Kubernetes deployments

A fantastic resource for your Kubernetes troubleshooting adventures.

omrikiei/ktunnel: A cli that exposes your local resources to kubernetes

A CLI tool that establishes a reverse tunnel between a kubernetes cluster and your local machine.

luryus/light-operator: Control smart lights with Kubernetes

Light-operator allows managing smart lights with Kubernetes custom resources.

Kubernetes: The Road to 1.0 by Brian Grant

In many ways, Kubernetes is more “open-source Omega” than “open-source Borg”, but it benefited from the lessons learned from both Borg and Omega.

Last week in my studies

This past week I studied…

  • Docker
  • Kubernetes

Docker

Though I’ve installed plenty of Docker containers in my Homelab, I don’t fully understand what is going on ‘under the hood.’ How are containers built? What’s the difference between an image and a container? What is the method to the madness of port mapping and other configuration options? I no longer wish to simply run Docker containers, I wish to fully understand them.

As such, I am taking a two-pronged approach to learning about Docker. The first is that I’m reading the book, ‘Docker Deep Dive’ by Nigel Poulton. The second is that I am making my way through the Docker Training Course for the Absolute Beginner on KodeKloud.

I’ll often tackle learning a new subject via multiple avenues. I find it keeps me from getting bored as well as it gives me a different perspective as each instructor/author has a unique way to approaching a topic. These multiple inputs on the same topic work well to keep me energized and learning.

I’ve learned some new commands and reinforced others. I’ve also dug in deep on some commands such as docker exec nameofimage cat /etc/hosts to reveal information about the underlying OS, and docker run -it kodekloud/simple-prompt-docker to enter interactive mode and attach to the terminal in the container.

These latter two commands demonstrate my commitment to understanding Docker far beyond simply running containers on my homelab. Knowing these types of commands and understanding their value are critical to interacting with and troubleshooting Docker containers.

Kubernetes

As with learning Docker, my approach to learning Kubernetes has been multi-dimensional. I’m about 95% complete with the KodeKloud Certified Kubernetes Administrator (CKA) with Practice Tests course on Udemy. As well, I’m making my way through The Kubernetes Book by Nigel Poulton. And I’ve got a four node K3s cluster I built from the ground up in my homelab to learn and apply everything I can about Kubernetes in a real world environment.

This past week, as I’ve traversed the (Troubleshooting Section) labs on KodeKloud, I’ve struggled, and learned from my struggles, some valuable skills. We are tasked with prompts like this…

The cluster is broken. We tried deploying an application but it’s not working. Troubleshoot and fix the issue.

That’s all they give you. However, they do give you a hint… ‘Start looking at the deployments.’

Here’s a peak at the troubleshooting approach I learned and implemented…

First, let’s take a look at the nodes

kubectl get nodes

Nodes are in a ready state. That’s a good thing. Next, let’s take a look at the Deployments.

kubectl get deploy

OK, I see the app that is not deploying successfully. The Ready state is 0/1 so this requires further investigation. This is where the describe command comes in handy to show us the deployment manifest.

kubectl describe deploy app

Nothing jumps out as problematic here so next let’s take a look at the ReplicaSet.

kubectl get rs # Note I am using rs as shorthand instead of replicaSet

We have one replicaSet so let’s take a look at it

kubectl describe rs app-4872bddbc87

The Pods Status is 1 Waiting. So, let’s take a look at the pod

kubectl get pod

The pod is in a pending state so let’s take a closer look

kubectl describe pod app-4872bddbc87

We can see that the Events, listed at the bottom, have not started. The pod is in a pending state and it is not assigned a node. This leads us to the Scheduler since it is the Scheduler job to assign a Pod to a Node.

The Scheduler is in the kube-system namespace so let’s check it out

kubectl get pods -n kube-system

I can see that the kube-scheduler-controlplane status is CrashLoopBackOff so further investigation of this pod is warranted.

kubectl describe pod -n kube-system kube-scheduler-controlplane

In the Events section, we can see errors. One item in particular stands out

exec: "kube-schedulerrr": executable file not found in $PATH: unknown

Aha! Someone made a typo in the command. Let’s fix it.

We know that the kube-scheduler is a static pod whose manifest resides in /etc/kubernetes/manifests/ so let’s edit the file (using Vim, of course) and fix the typo.

vi /etc/kubernetes/manifests/kube-scheduler.yaml

Let’s see if that did the trick

kubectl get pods -n kube-system --watch

I add the --watch flag to see the pod status update in real time. After a bit, the pod is in a running state.

Finally, let’s check out the pod on the default namespace to see if the problem has been fixed

kubectl get pods

Indeed, the pod is running. For good measure, let’s check out the Deployment as well

kubectl get deploy

The Deployment shows 1/1 as ready.

Problem solved. This is the kind of sleuthing that I find fascinating. There is a method to the troubleshooting madness and I find it enjoyable and rewarding.

In the DevOps Skool community that I belong to, one of the members shared with me A visual guide on troubleshooting Kubernetes deployments, a valuable resource created by learnk8s which is quite handy.

In addition to focusing on troubleshooting, I’ve been writing atomic notes in my note taking system, breaking down core Kubernetes topic and explaining them in my own words. As my mentor says…

If you can’t write about it, then you don’t understand the topic. - ‘Everything Starts with a Note-taking System’ Mischa van den Burg

I take this to heart. I have found that when I break a topic down into it’s most basic component and write about it in my own words, my comprehension increases ten fold.

I’m not interested in simply passing the CKA and other exams. My intention is to become a valuable, incredibly knowledgable and enthusiastic Kubernetes Administrator.

Flux for GitOps

My Skool teacher encouraged me to use Flux instead of Argo CD so I’m going to make the switch.

As I review the docs this Friday evening (while my wife is off skating at the local rink so I have some time alone) I’ve decided to follow the monorepo approach whereby I will store all of my Kubernetes manifests in a single Git repository.

Git monorepo

The separation between apps and infrastructure makes it possible to define the order in which a cluster is reconciled, e.g. first the cluster addons and other Kubernetes controllers, then the applications.

Kubernetes Odysseys for June 28, 2024

Kubernetes Logo

Kubernetes Odysseys are curated highlights from my explorations across the web. I seek out and share intriguing and noteworthy links related to all things Kubernetes. You can find all my Kubernetes bookmarks on Pinboard and explore all my blog posts categorized under Kubernetes.

Deploying a highly-available Pi-hole ad-blocker on K8s

A well written article on installing Pi-hold on your cluster for high availability. I plan to follow these instructions for my own cluster.

Sidero Omni: the platform for Edge Kubernetes

Whether you are running single node clusters, complete Kubernetes clusters at the edge, or just want to run worker nodes at the edge with control plane nodes in the cloud, the Sidero Omni platform will make it easy, secure, and performant.

arkade - Open Source Marketplace For Developer Tools

With over 120 CLIs and 55 Kubernetes apps (charts, manifests, installers) available for Kubernetes, gone are the days of contending with dozens of README files just to set up a development stack with the usual suspects like ingress-nginx, Postgres, and cert-manager.

SUSE Acquires StackState for Cloud-Native Observability

The StackState observability platform will be embedded into the Rancher Prime version of the platform for enterprise IT teams. Longer term, SUSE envisions applying StackState’s observability capabilities across its portfolio, including areas like cost management, smart issue remediation, environment optimization and industrial Internet of Things (IoT) observability.

CKS Study Guide 2024 - PASS your Certified Kubernetes Security Specialist Exam

This up-to-date YouTube study guide will provide you with all you need to know to get your CKS certification.

Have I mentioned how much I’m enjoying OrbStack?

OrbStack is the fast, light, and easy way to run Docker containers and Linux.

[orbstack.dev](https://orbstack.dev/)

My kids friend told me I look like a cross between Einstein and a hippy.

Objective: Configure network on K3s

MetalLB

MetalLB is a Kubernetes-based load balancer that assigns IP addresses to services, facilitating network requests to those IPs.

Install MetalLB on main control node

# Add MetalLB repository to Helm

helm repo add metallb metallb.github.io/metallb

Check the added repository

helm search repo metallb

Install MetalLB

helm upgrade –install metallb metallb/metallb –create-namespace \ –namespace metallb-system –wait

Now that MetalLB is installed, we need to assign an IP range for it. In this case, we allow MetalLB to use the range 10.0.20.170 to 10.0.20.180.

cat << 'EOF' | kubectl apply -f -
apiVersion: metallb.io/v1beta1
kind: IPAddressPool
metadata:
  name: default-pool
  namespace: metallb-system
spec:
  addresses:
  - 10.0.20.170-10.0.20.180
---
apiVersion: metallb.io/v1beta1
kind: L2Advertisement
metadata:
  name: default
  namespace: metallb-system
spec:
  ipAddressPools:
  - default-pool
EOF

Traefik

Traefik is an open-source reverse proxy and load balancer used extensively in Kubernetes environments. Traefik is pre-installed with K3s.

However, to utilize Traefik, a working DNS server external to the Kubernetes cluster is required. For local testing, the /etc/hosts file can be modified to act as a faux DNS server.

Edit /private/etc/hosts

10.0.20.170 turing-cluster turing-cluster.local

Now, when we enter https://turing-cluster.local in the browser, we are redirected to a 404 page of Traefik.

Later, I will add this info to my DNS server. For now, my testing works.

Next up… storage.

Played pickle ball today and had a blast.

Now I move on to installing Kubernetes.

On Node 1

curl -sfL https://get.k3s.io | sh -s - --write-kubeconfig-mode 644 --disable servicelb --token <1Password> --node-ip 10.0.20.160 --disable-cloud-controller --disable local-storage

On Nodes 2 –4

curl -sfL https://get.k3s.io | K3S_URL=https://10.0.20.160:6443 K3S_TOKEN=<1Password> sh -

Installing apps that would have been installed had I replaced dietpi.txt per the instructions.

  • OpenSSH Client
  • Samba Client
  • RPi.GPIO
  • OpenSSH Server
  • Python 3 pip

Label nodes

kubectl label nodes cube01 kubernetes.io/role=worker
kubectl label nodes cube02 kubernetes.io/role=worker
kubectl label nodes cube03 kubernetes.io/role=worker
kubectl label nodes cube04 kubernetes.io/role=worker

Denote the node-type as “worker” for deploying applications

kubectl label nodes cube01 node-type=worker
kubectl label nodes cube02 node-type=worker
kubectl label nodes cube03 node-type=worker
kubectl label nodes cube04 node-type=worker

And we now have a four node Kubernetes cluster!

kubectl command in terminal

Up next, install Helm and Arkade.

Today’s K3s objective: OS Setup

Assign IP addresses in UniFi. I don’t like assigning IP addresses anywhere other than at the router level so I won’t be doing this directly on the pi’s.

Configure each pi with timezone, hostname, password.

Append the following to cmdline.txt

group_enable=cpuset cgroup_enable=memory cgroup_memory=1

Modify /etc/hosts

10.0.20.160 cube01 cube01.local
10.0.20.161 cube02 cube02.local
10.0.20.162 cube03 cube03.local
10.0.20.163 cube04 cube04.local

Finally, install iptables

apt -y install iptables

Next I’ll be performing the Kubernetes installation.

1Password is my password manager of choice. I’ve probably been using it for at least ten years? I created a new vault today called Homelab. Will be nice to move all those types of passwords and other credentials into a segmented vault.